Setting up Windows 8 Laptops for VWCCWiFi
Windows 8 actually figures out most of the settings to connect to VWCCWifi. You need to tell Windows 8 the certificate to verify against. The following steps will do that:
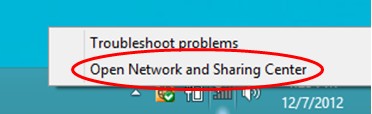
1. Right-click on the wireless icon in the tray normally found in the lower right-hand corner of your screen to bring up the menu.

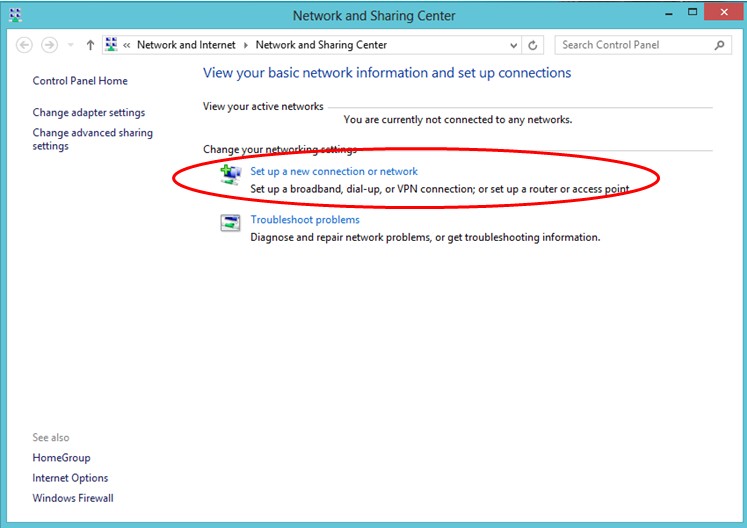
2. Select Open Network and Sharing Center.
3. Next select Set up a new connection or network.
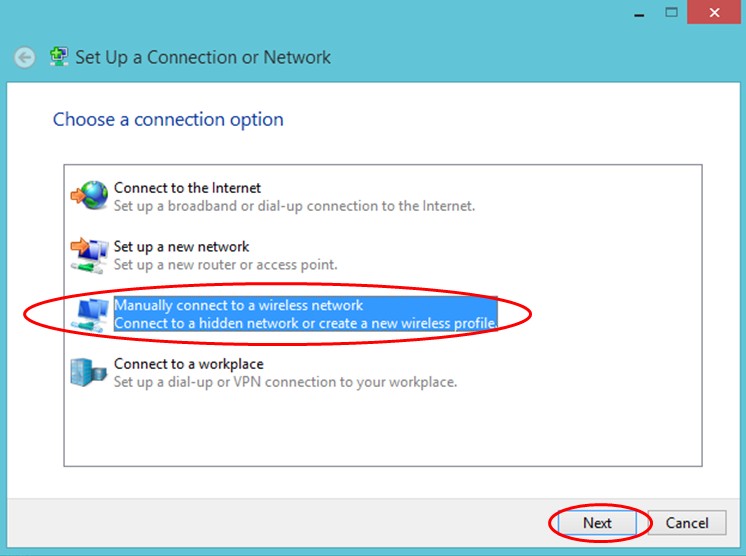
4. Highlight Manually connect to a wireless network, then press the Next button.
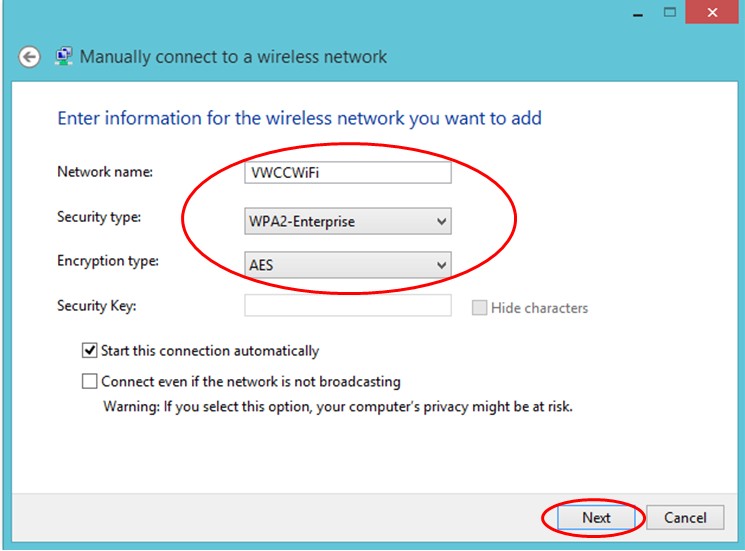
5. Enter the following information:
- Network name: VWCCWiFi (note the two lowercase i's. Match the spelling exactly.)
- Security type: WPA2-Enterprise
- The rest of the information should already be correct, if not match the screen.
- Press the Next button.
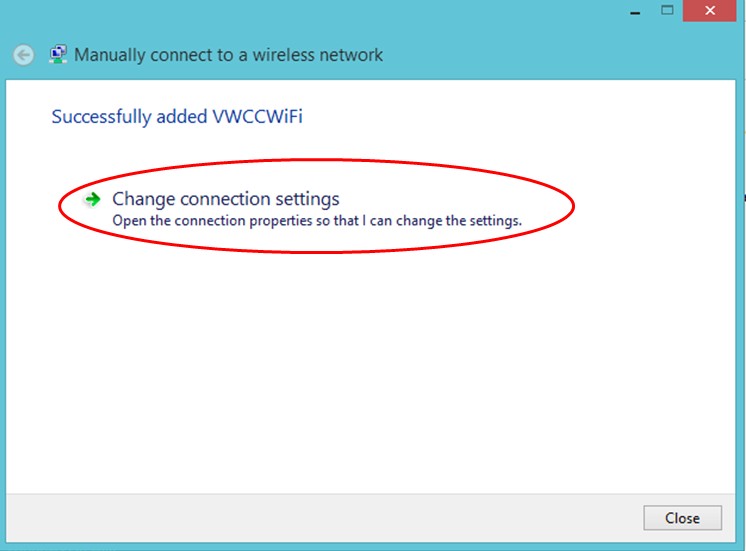
6. The next screen should tell you that VWCCWiFi has been successfully added, if not go back to step 1.
If VWCCWiFi was successfully added, then select Change connection settings.
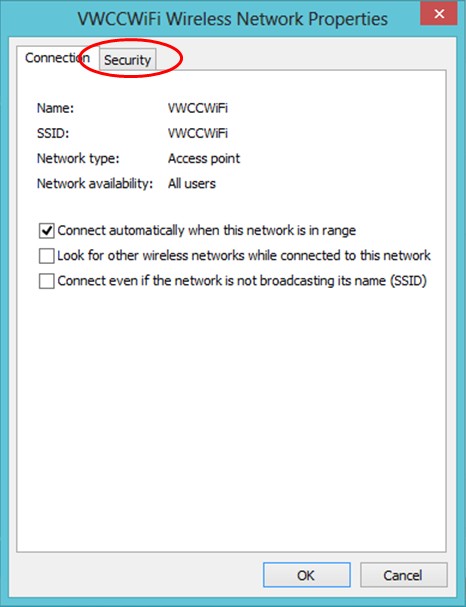
7. Select the Security tab.
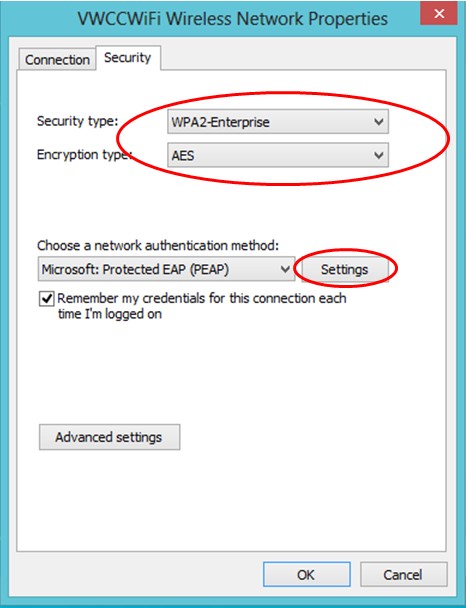
8. Ensure that the Security type is set to WPA2-Enterprise, the Encryption type is AES and the network authentication method is Microsoft: Protected EAP (PEAP). Then press the Settings button.
Note: The checkmark next to remember my credentials can be unchecked if you want a different user to be able to login.
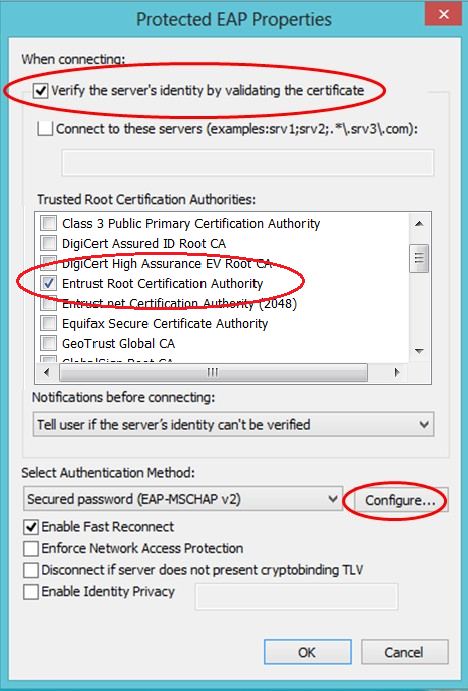
9. Ensure the Verify the server's identity by validating the certificate box is checked.
Select the Trusted Root Certification Authority entitled Entrust Root Certification Authority.
Ensure that the Authentication Method is set to Secured password (EAP-MSCHAP v2) and the Enable Fast Reconnect box is checked. Then press theConfigure... button.
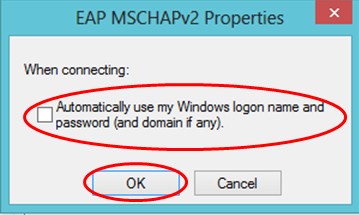
10. Ensure Automatically use my Windows logon name and password (and domain if any) is unchecked.
Then press the OK button 3 times and the Close button once to close all open dialog windows.
11. Now left-click on the wireless network icon in the lower right-hand corner of the screen.
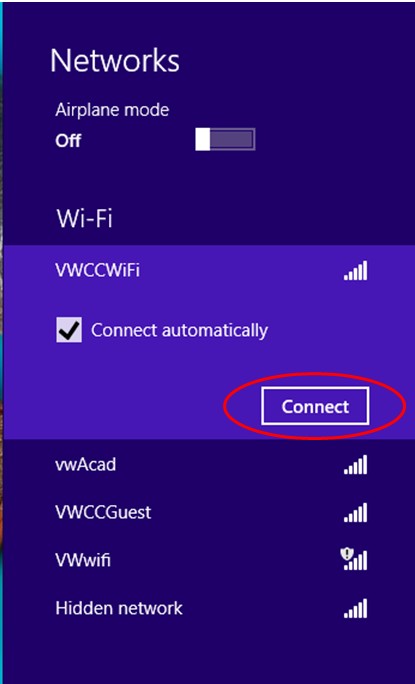
The available wireless networks should show up on the right-side of the screen.
12. Select VWCCWiFi and then press the Connect button.
13. You'll first see the message that says Checking network requirements, then it will ask for your username and password. It's looking for your MyVWCC username and password. After entering them, press the OK button.

Once you have entered the username and password information, give it another minute or so, then open a browser to check to see that you can now access the Internet. You should be successful. The only thing that may be required in the future is to change the password if you have changed your MyVWCC password.
Any questions should be directed to:
Virginia Western Help Desk
Business Science building, Room M273
Phone: 540-857-7354
Email: